Output Mapping
In this part of the tutorial, you will see how to use output mapping. Similarly to input mapping, the output mapping defines what data your component produces in the end users’ project. A component cannot directly write data to the project Storage; the produced data are stored in the end users’ project when the component finishes.
Output mapping is therefore used when your application needs to send data to the customer project – these are typically extractors and applications. Implementing the input mapping requires three steps:
- turning on the default bucket option (or adding output mapping to the component UI)
- adding output mapping to the component source code
- verifying
Unlike input mapping, the output mapping is fully optional. That means that
it can be configured similarly to the input mapping (using the genericDockerUI-tableOutput flag) or
using the Default bucket option. The latter means that all tables produced in the
/data/out/tables/ folder will be uploaded to a Storage bucket with a generated name.
This is almost identical to writing
Transformation code – the only difference is that you need to
use absolute paths (or the KBC_DATADIR environment variable).
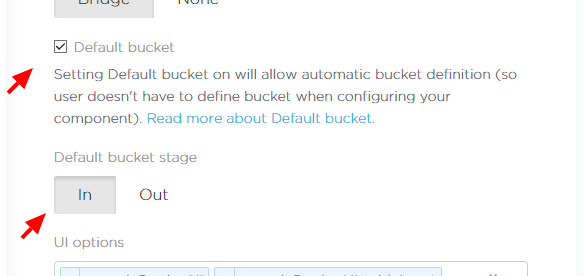
Configuring Default Bucket
Using the default bucket is the preferred option as it allows simpler configuration of the component.
To enable the default bucket for your component, simply go the Developer Portal and tick the respective
checkbox. You also need to select the stage of the bucket. We recommend using in for
extractors and out for other components.
Modifying Source Code
You can modify the sample component code to, for example, the one below. The code takes a single arbitrary table on input and produces two tables – one with even rows and one with odd rows.
import csv

print("Hello world from python")

csvlt = '\n'
csvdel = ','
csvquo = '"'
with open('/data/in/tables/source.csv', mode='rt', encoding='utf-8') as in_file, \
        open('/data/out/tables/odd.csv', mode='wt', encoding='utf-8') as odd_file, \
        open('/data/out/tables/even.csv', mode='wt', encoding='utf-8') as even_file:
    lazy_lines = (line.replace('\0', '') for line in in_file)
    reader = csv.DictReader(lazy_lines, lineterminator=csvlt, delimiter=csvdel,
                            quotechar=csvquo)

    even_writer = csv.DictWriter(odd_file, fieldnames=reader.fieldnames,
                                 lineterminator=csvlt, delimiter=csvdel,
                                 quotechar=csvquo)
    even_writer.writeheader()

    odd_writer = csv.DictWriter(even_file, fieldnames=reader.fieldnames,
                                lineterminator=csvlt, delimiter=csvdel,
                                quotechar=csvquo)
    odd_writer.writeheader()
    i = 0
    for row in reader:
        if i % 2 == 0:
            even_writer.writerow(row)
        else:
            odd_writer.writerow(row)
        i = i + 1
This script reads a CSV file line by line and checks whether it is odd or even.
Finally, the result is written to either odd.csv or even.csv.
Commit and push the code in your repository and tag it with a normal version tag. This will trigger a build on Travis CI and automatically deploy the new version into Keboola. Keep in mind that after the deployment, it may take up to 5 minutes for the update to propagate to all Keboola instances.
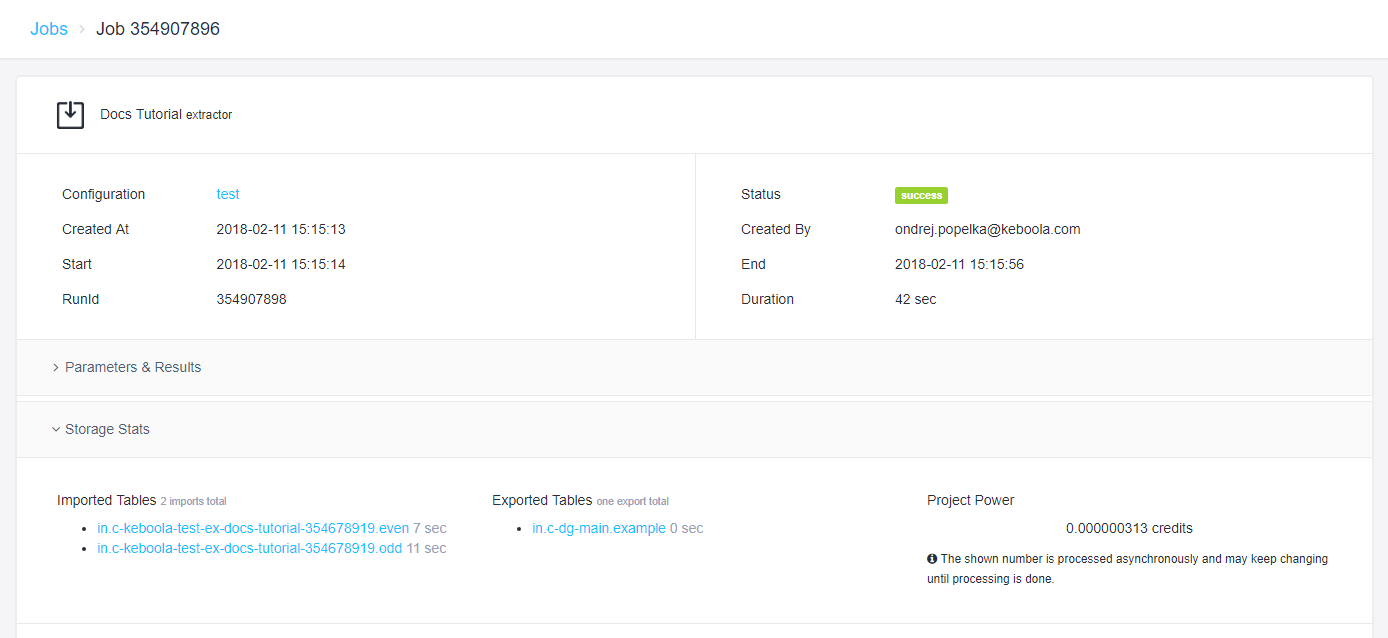
Verifying
If you configured the default bucket option, nothing changes in the UI. If you followed the previous part of our tutorial, you don’t have to do anything. Just run the component and you should see that two tables were produced.
If you happen to see the following error message:
CSV file 'odd' file name is not a valid table identifier, either set output mapping for 'odd.csv' or make sure that the file name is a valid Storage table identifier.
It means that you have not set the default bucket properly (thus no bucket is generated for the component, and we don’t know where to put ‘odd’).
Summary
Your component can now successfully write tables to a Keboola project. You can read more about other output mapping options in the data folder specification. Also, the manifest files contain metadata which you might want to set (e.g., primary key). The next part of the tutorial will show you how to work with configuration parameters.