Component Quick Start
- Before You Start
- Creating Component
- Creating Deployment Account
- Initializing Component
- CI Setup
- Building Component
- Running Component
- Component Repository
- Summary
In this tutorial, you will create a simple “Hello, World!” component which runs in Keboola.
Before You Start
You need to have a computer with working Docker to develop the Keboola component code. To be able to create new components, you also need to have an account in the Keboola Developer Portal, which manages the list of components available in Keboola.
The Developer Portal uses different credentials than Keboola. Creating an account is free; it requires a working email address (to which a confirmation email will be sent) and a mobile phone for a mandatory two-factor authorization.
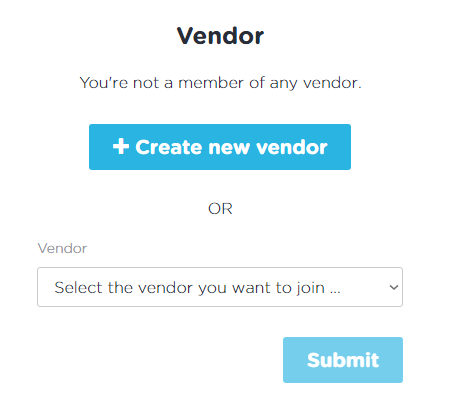
When you log in to the Developer Portal, you have to join a vendor — an organization of developers. Every Keboola component has to have a vendor assigned. If you join an existing vendor, a vendor administrator has to approve your request. If you do not work for a company, create a vendor with your name (even a single developer has to be assigned to a vendor). When you join or create a vendor you should also receive access to a development Keboola project.
In order to create a new vendor, a Keboola administrator has to approve your request, and you will receive a development project in Keboola. In addition to that, you need to provide us with a channel for receiving internal errors from your components. Anything supported by Papertrail notifications is available, though e-mail or a Slack channel is most commonly used.
When you are confirmed as a member of a vendor, you may proceed to creating your own component. The example component is written in the Python language, but no knowledge of Python is required. Before you continue with this tutorial, make sure you
- can log in to the Developer Portal.
- can log in to one of the Keboola stacks
- have a Github account.
Note: Even though the tutorial assumes using GitHub + Travis services, they are not required for extending Keboola. We use them because we like them the most. The deployment documentation shows how to configure, for example, Bitbucket and GitLab integrations.
Creating Component
To add a component, use the Add a component button on the main page, and fill in the component name and type:
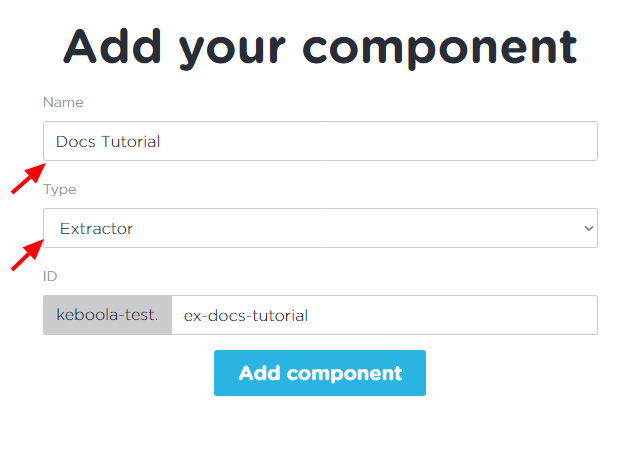
Important: Do not use the words ‘extractor’, ‘writer’, or ‘application’ in the component name.
Choose the appropriate component type:
extractor– brings data into Keboolawriter– sends data out of Keboolatransformation– does some transformation of the data, read morecode pattern– generates code for transformation’s component, read moreapplication– another arbitrary component
The above does not mean technically that, for example, an extractor cannot send data out of Keboola or an application cannot bring new data into Keboola. It is a matter of user perception, so use your judgement to select the correct type.
When you fill the form in, you will obtain a component ID (in the
form vendor-id.component-name, for instance, keboola-test.ex-docs-tutorial). Make a note of the ID.
Creating Deployment Account
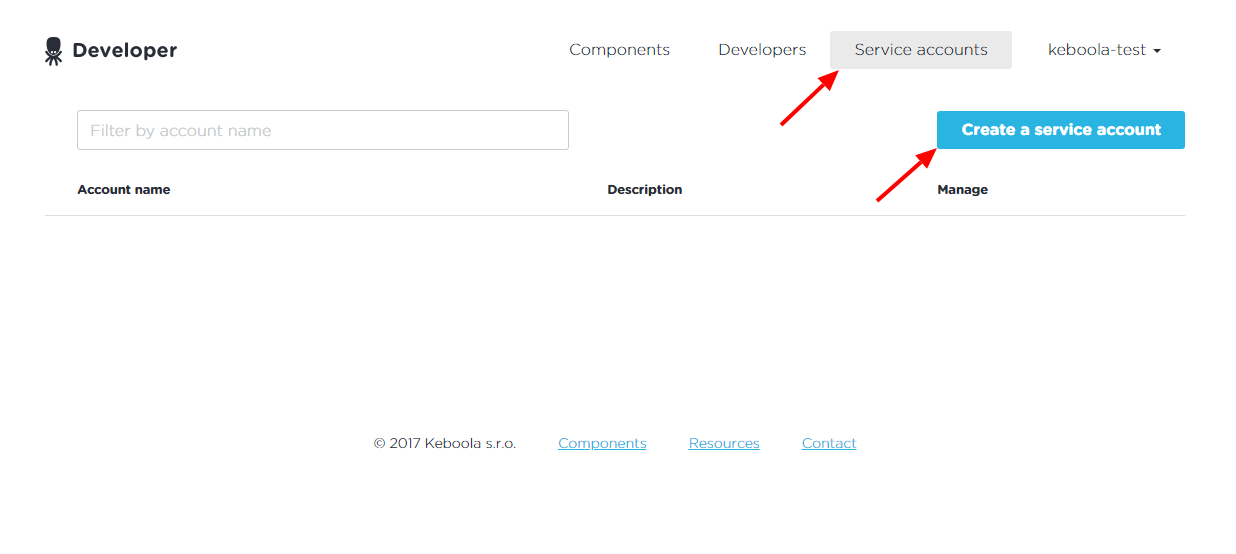
To be able to deploy the component to Keboola, you will need service credentials. For security reasons, we strongly advice against using your own credentials in any deployment service. To create new deployment credentials, click the Create a service account button on the Service accounts page.
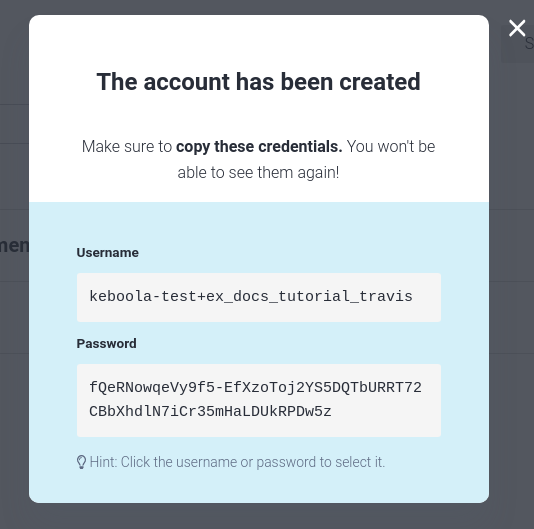
Fill in a name (e.g., ex_docs_tutorial_travis) and description (e.g., Travis deployment credentials) and confirm:
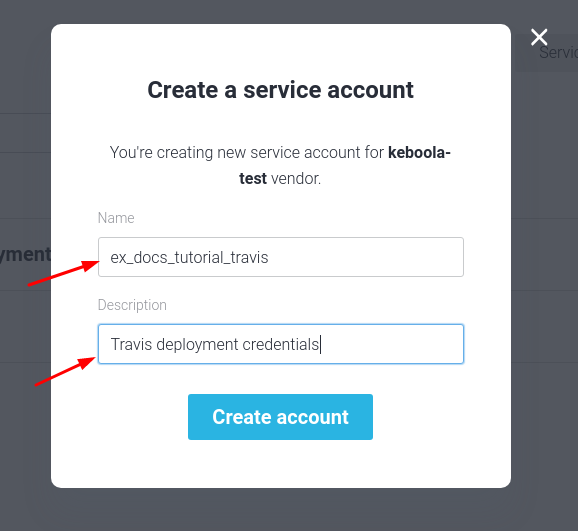
Take a note of the username and password.
Initializing Component
Once you have the component ID and the service account username and password, you can create a component, the most convenient way is to use one of our templates.
Python
Prerequisite Install the cookiecutter tool:
pip install cookiecutter
Usage
- Run
bash cookiecutter gh:keboola/cookiecutter-python-component - Fill in requested parameters:
template_variant- Where is your empty repository (Github, Bitbucket)repository_url- (OPT) URL of your repository, if filled in the template git repository is initialised and remote set to your repository.component_name- Name of your componentrepository_folder_name- (OPT) Name of the destination folder. By default normalized component name.component_short_description- (OPT) short description that will be pushed to Developer Portal. May be edited incomponent_config/component_short_description.mdlater.component_long_description- (OPT) long description that will be pushed to Developer Portal. May be edited incomponent_config/component_long_description.mdlater.
- Set up CI environment variables (see the CI Setup section)
- Navigate to newly created folder and run
git push. The CI pipeline (action) should be now executed. If you add a tag to the commit, component will be pushed to your Developer Portal. - Modify the code in
src/component.pyandsrc/configuration.pyas you like.- You can set the configuration parameters in
data/config.json - You can execute the component via normal local environment without docker installed.
- Set any additional dependencies for your project in
requirements.txt
- You can set the configuration parameters in
More information on the template here
CI Setup
- Bitbucket: Enable pipelines in the repository.
- For Github: Check that the workflows are enabled.
The actions are present in
.github/workflows/folder.
- For Github: Check that the workflows are enabled.
The actions are present in
- Set
KBC_DEVELOPERPORTAL_APPenv variable (dev portal app id)
In case it is not set on the account level, set also other required dev portal env variables:
KBC_DEVELOPERPORTAL_PASSWORD- service account passwordKBC_DEVELOPERPORTAL_USERNAME- service account usernameKBC_DEVELOPERPORTAL_VENDOR- dev portal vendorKBC_STORAGE_TOKEN- (optional) in case you wish to run KBC automated tests
https://github.com/keboola/cookiecutter-python-component
PHP, R or just CI pipeline for GitHub or Bitbucket
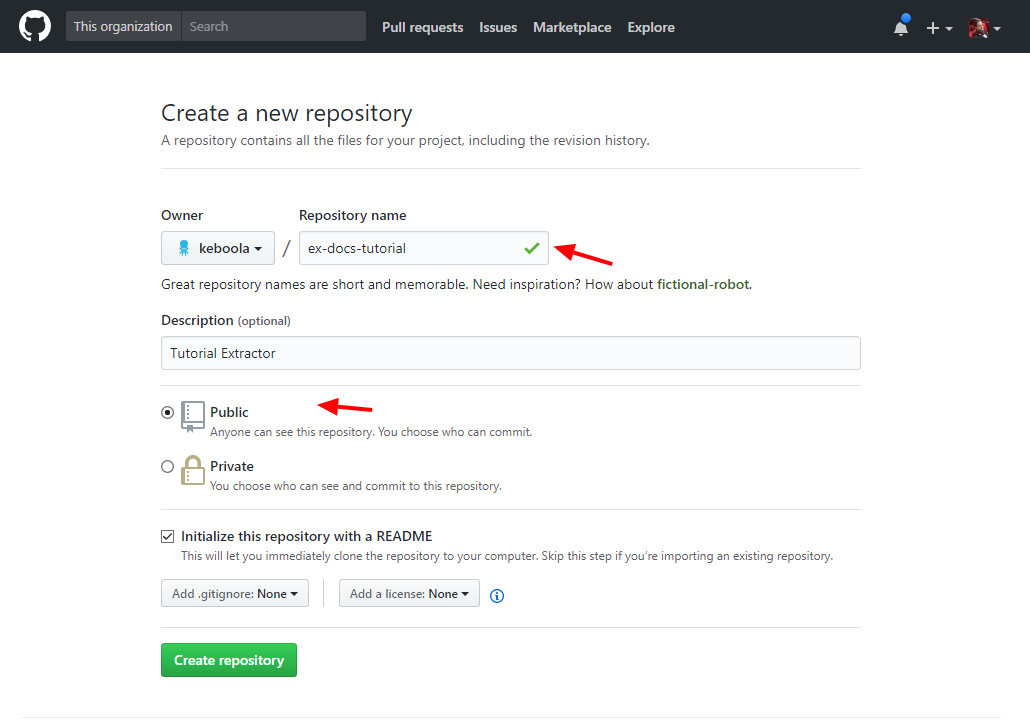
Create an empty Github repository. The name of the repository is arbitrary, but using the component is probably a good idea to avoid confusion.
Checkout the repository on your local computer and execute the following from the command line:
docker run -i -t --volume=/path/to/repository/:/code/ quay.io/keboola/component-generator
Replace /path/to/repository/ with an absolute local path to your empty repository. Follow
the on-screen instructions:
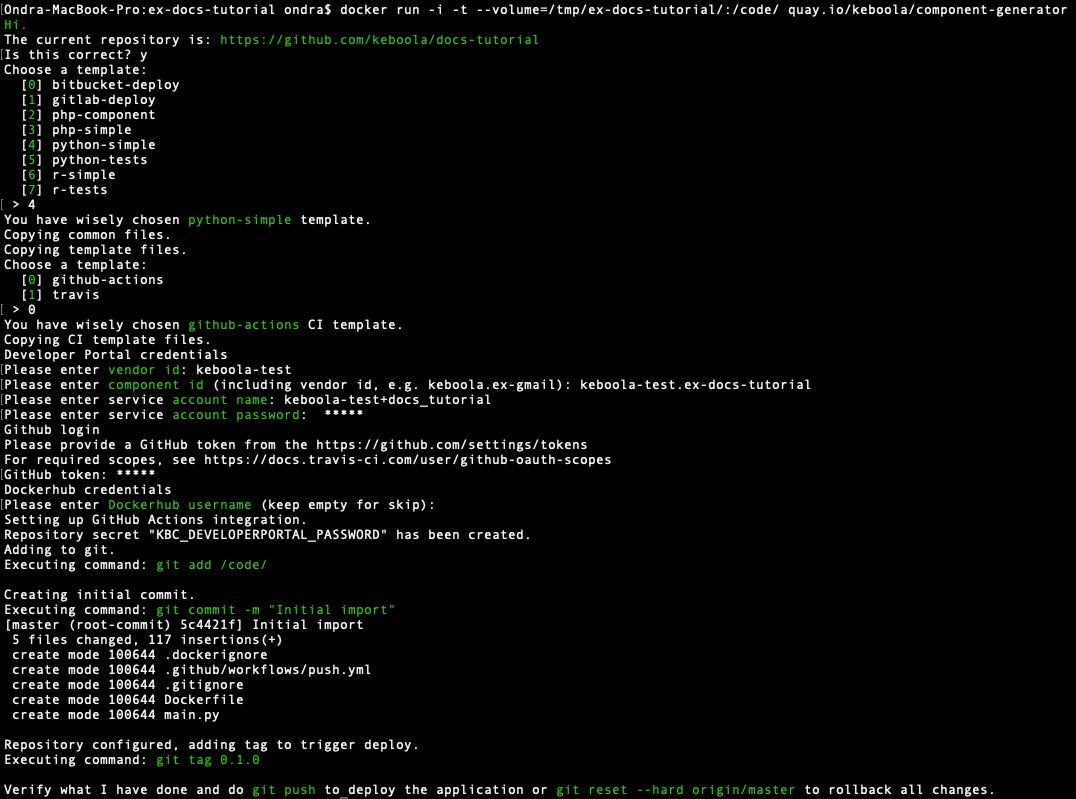
When done, you will have an initialized repository with a “Hello, World!” component.
In the above example, we chose the simple-python template, which contains the following:
- template.md – description of the template files
- main.py – a “Hello, World!” Python script
- Dockerfile – a Dockerfile defining the environment in which the script runs
- deploy.sh – a Bash script to deploy the component to Keboola
For Travis CI template contain:
- .travis.yml – a configuration file for Travis CI to automate the deployment
For GitHub Actions CI template contain:
- .github/workflows/push.yml – a configuration file for GitHub Actions CI to automate the deploy
Building Component
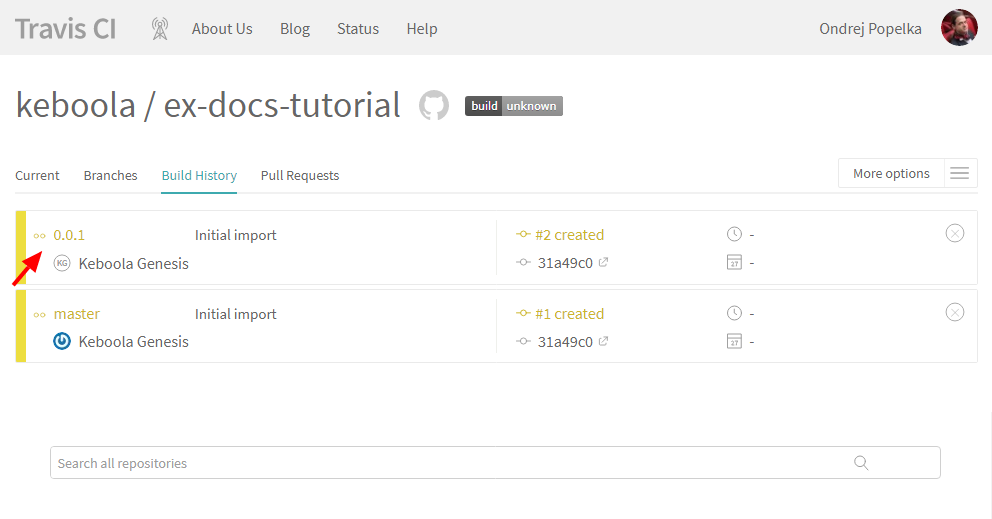
When done exploring, push to the repository.
This will automatically trigger a build on the Travis or GitHub Actions services; you can view the build
progress by visiting the provided link. In fact, two builds will be triggered: one
for the master branch, and one for the 0.1.0 tag.
Travis:
GitHub Actions:
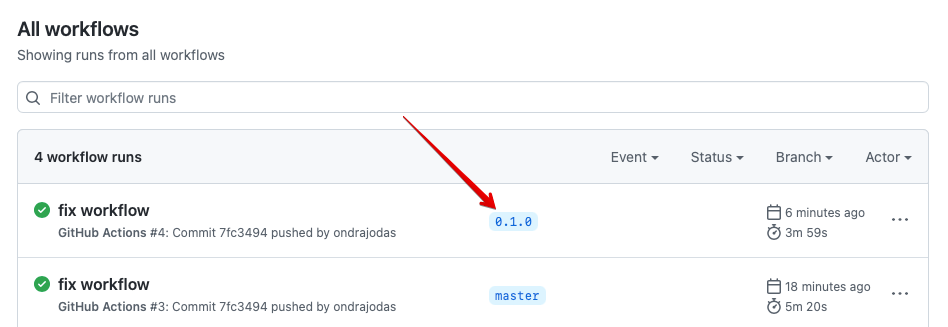
We are more interested in the latter because that is going to trigger the deployment to Keboola.
Travis:

GitHub Actions:
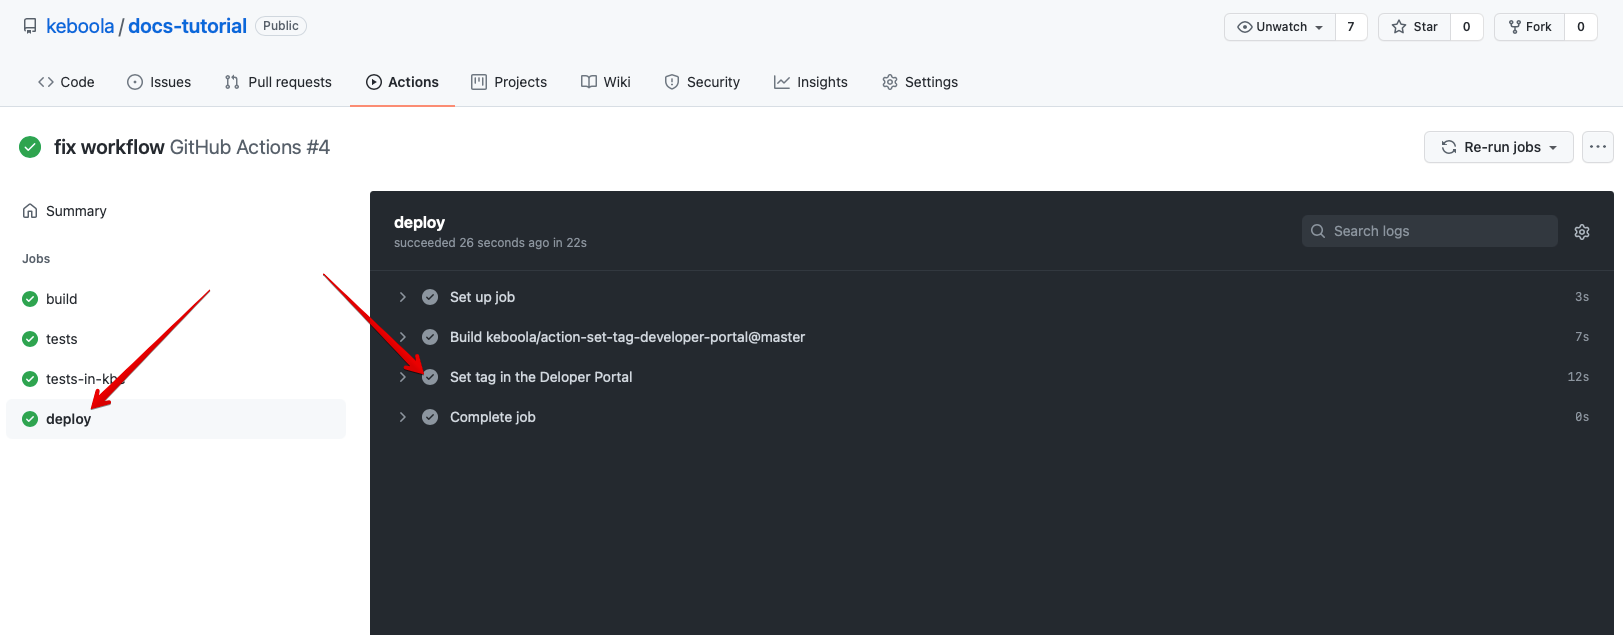
If the deployment passes without errors, the component will become available in Keboola. You can verify that in the component details (action Edit) in the Developer Portal:
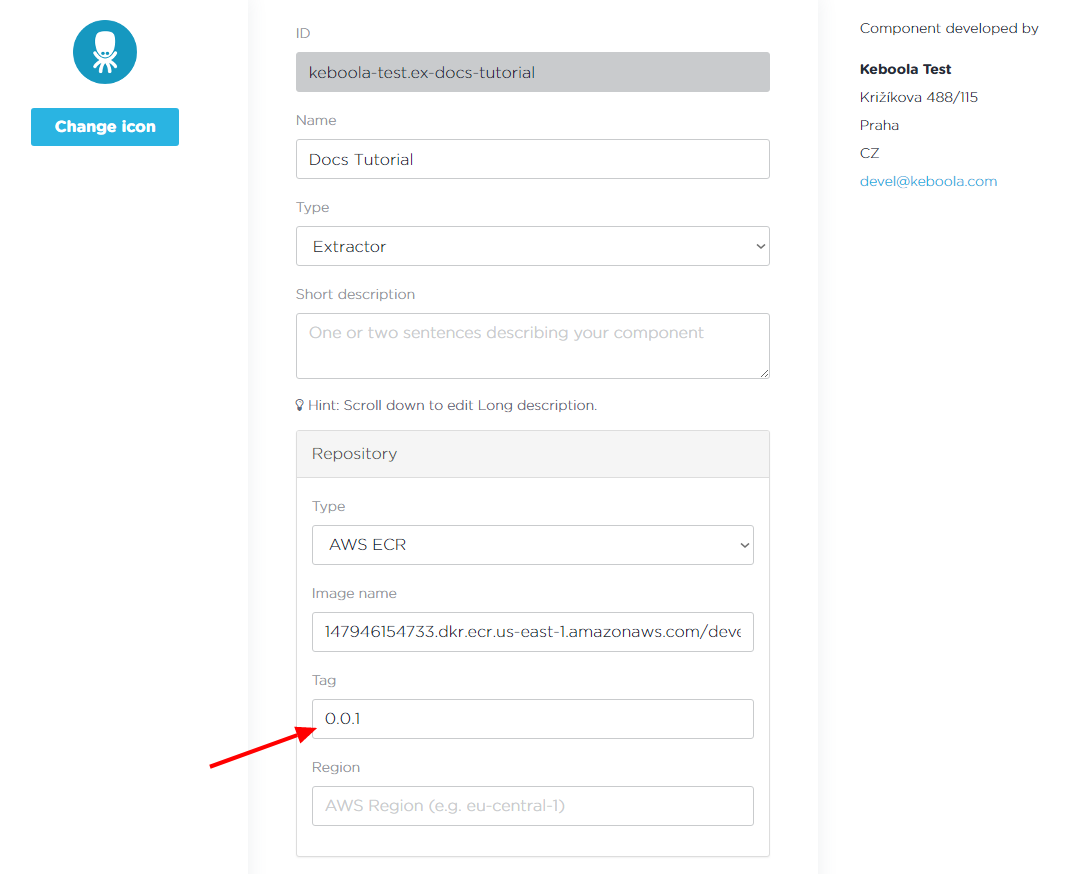
This means that the component deployment is fully automated. If you change the component source code, all you need to do is push the changes to the git repository and tag them with the normal version tag.
Running Component
Once the component is deployed, it becomes available in Keboola. Note that it takes up to 5 minutes for the changes to propagate to all Keboola instances. After that, you can configure the component by visiting the following URL:
https://connection.keboola.com/admin/projects/{DEFINED PROJECT_ID}/extractors/{YOUR COMPONENT_ID}
On this URL, you can create a configuration and run it without any settings.
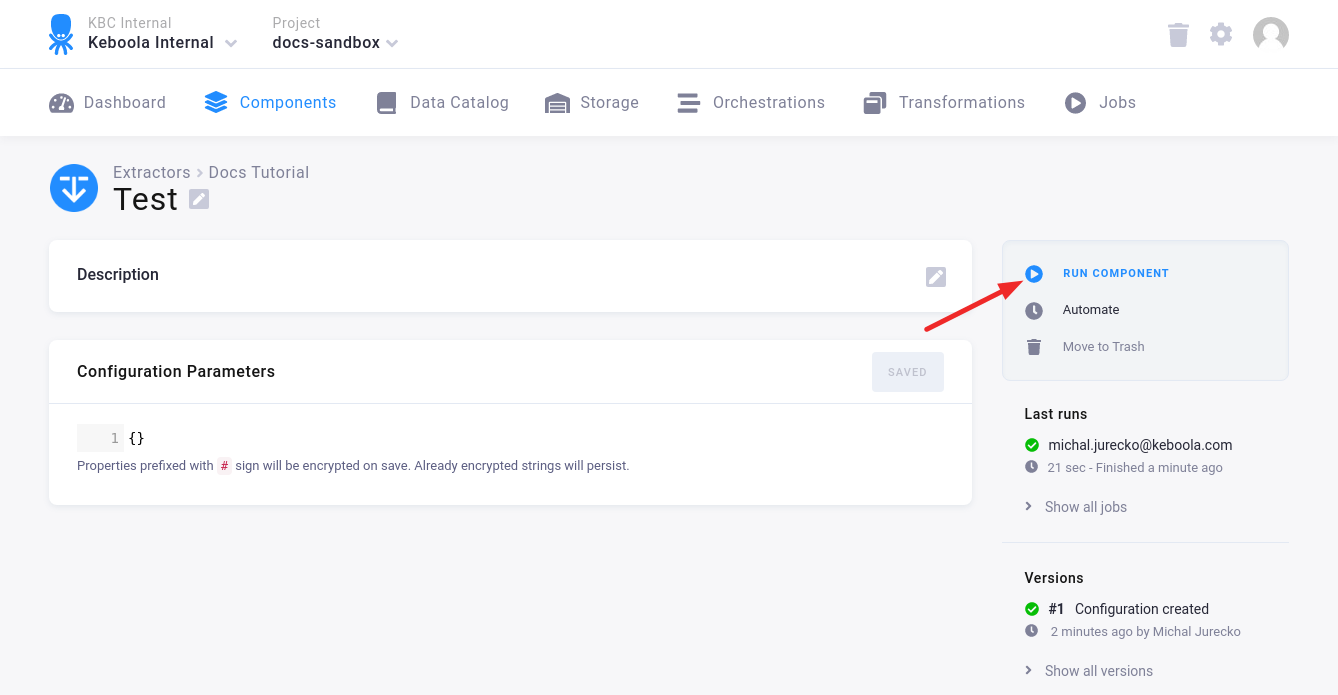
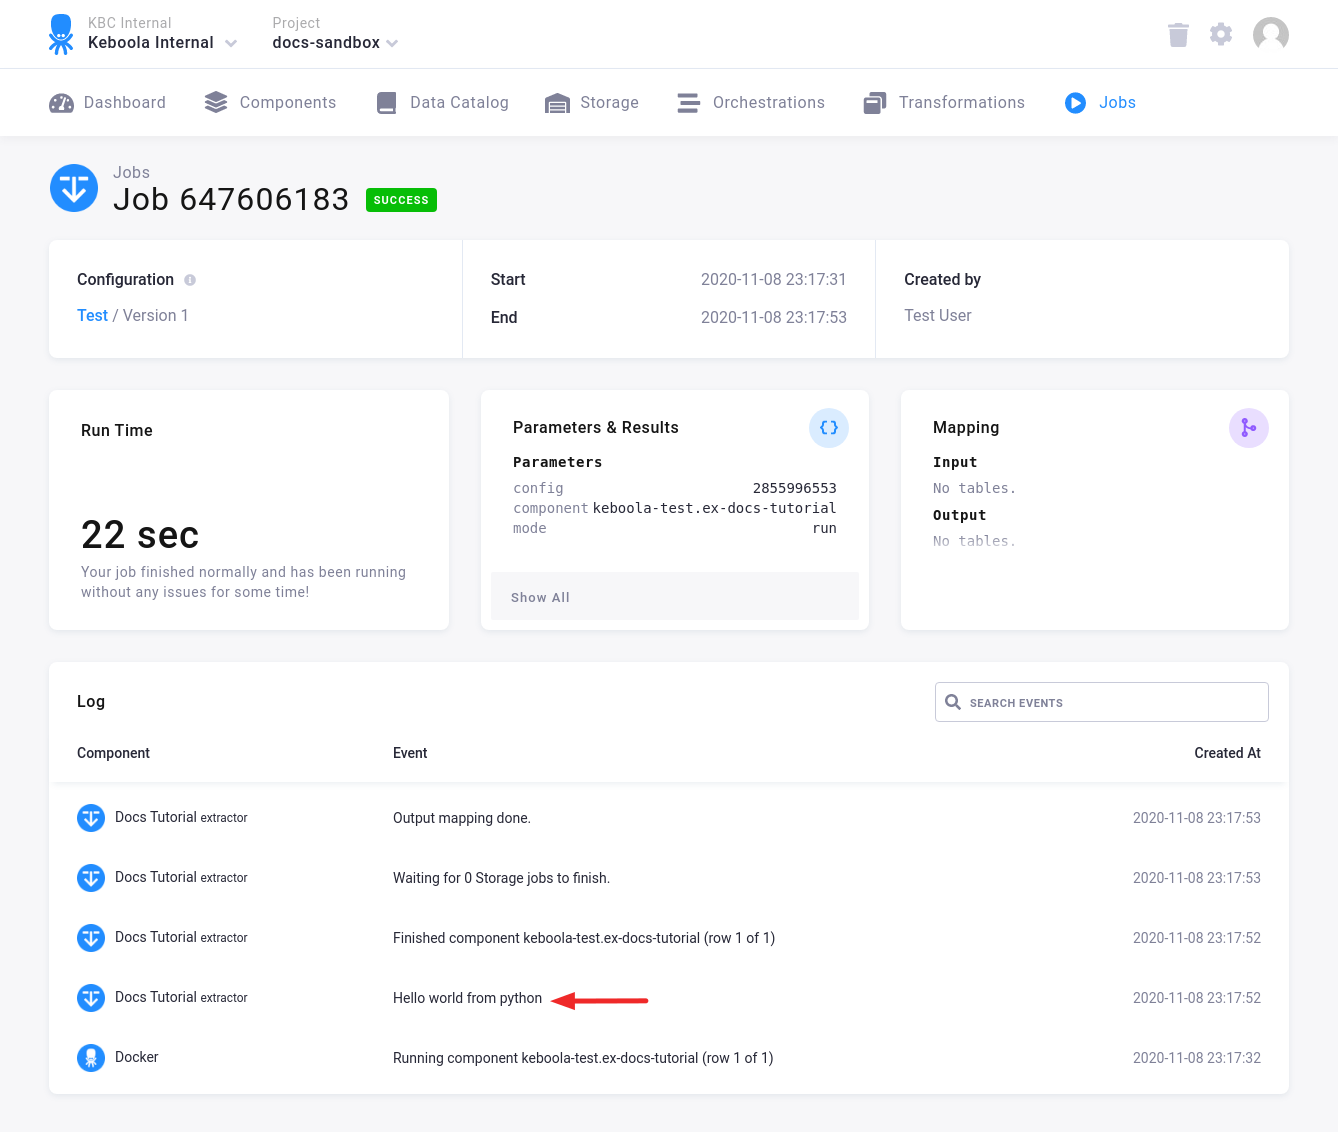
And you should see the “Hello, World” message in the events:
When you create a component, it will have assigned a memory limit of 256MB and run timeout of 1 hour. If you need to change those limits, please contact our support.
Component Repository
The component repository is a crucial part of the component setting because it actually defines what Docker image will be used when running the component. We offer free hosting of your Docker images in the Amazon Container Registry (AWS ECR) under our own account. All repositories in AWS ECR are private. When you create your component using the method shown above, we have just provisioned you with the Docker image hosting and you do not need to worry about it any more.
We also support the DockerHub and Quay.io registries, both public and private. However, as they are more prone to outages and beyond our control, we recommend using our reliable AWS ECR. Use DockerHub or Quay.io only if you, for instance, want the image to be public.
Summary
You have just created your own Keboola component. Although it does not do much, it shows the easiest path to bringing your own application logic to Keboola. You can now continue with other parts of the tutorial:
- using input and output mapping
- using configuration parameters
- configuring a processor
- debugging a component
- implementation notes for specific languages
Although you rarely need all of the above parts (e.g., you do not need input mapping when building an extractor), we suggest you go through all of them to gain a general overview of the available options. You can also read all the details in the respective parts of the documentation:
- general information about the common interface
- exchanging data in data folders
- manifest files
- OAuth support
- deployment settings (including Bitbucket integration)
- UI settings